5 Battery Management Exercises You Can Try at Home Today
In our last post, we mastered memory cards. But a memory card without power is just a tiny piece of plastic. Your camera’s battery is the heartbeat of your photography, and understanding how it behaves can mean the difference between capturing a perfect moment and watching it slip away. These five exercises will turn you into a battery expert, and you do not even need to leave your house.
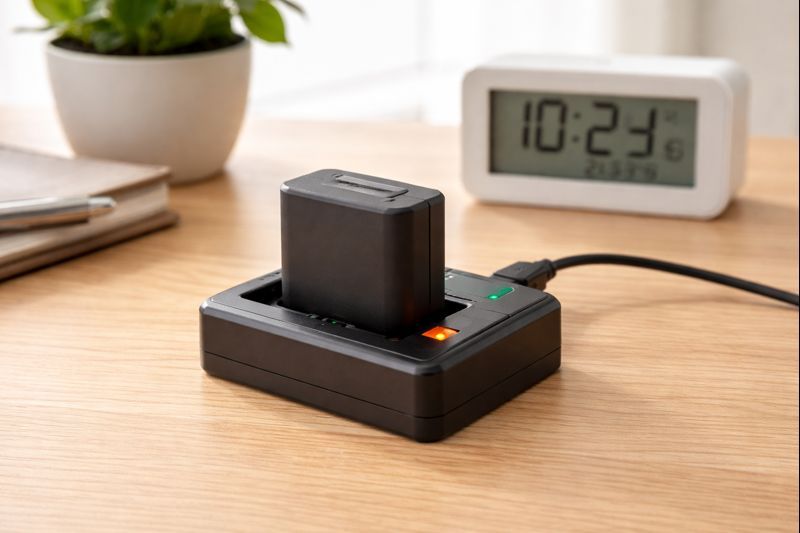
Exercise 1: The Charge Log
The task: Record exactly how long it takes to charge your battery from empty to full.
This simple timing exercise tells you a lot about your battery’s health. Most camera batteries take between one and three hours to charge fully, but yours might be different. Knowing the exact time helps you plan ahead. If you know your battery takes ninety minutes to charge, you can plug it in before dinner and know it will be ready for your evening walk. It also helps you spot problems. If your battery suddenly starts taking five hours to charge, you know something is not right. Think of it as learning how long your kettle takes to boil – useful information you use without thinking.
How to approach it: Wait until your camera shows the battery is completely empty. A little flashing icon usually tells you this. Note the exact time you plug the charger into the wall. Set a timer or write the start time down. When the charger light changes colour or turns off, note the finish time. Calculate how many minutes passed. Do this three times on different days and take an average. Write this number on a sticky note and keep it with your charger.
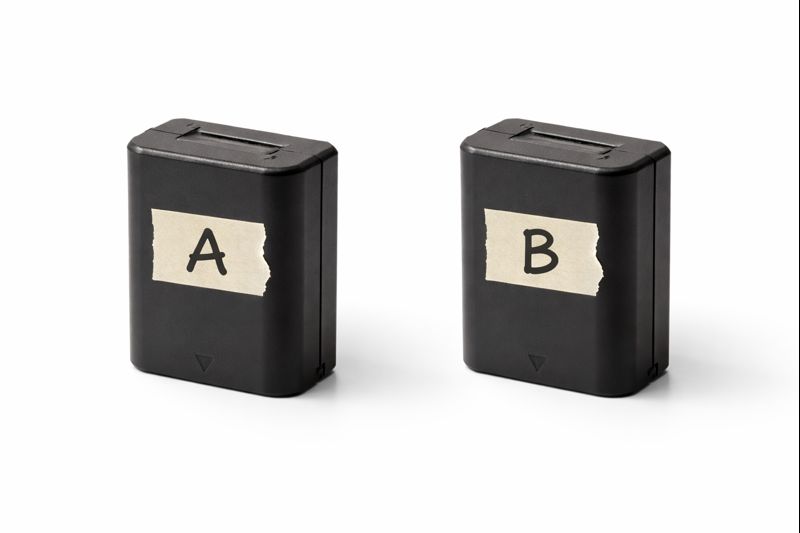
Exercise 2: The Spare Battery Test
The task: If you own a spare battery, alternate between them each week.
Many photographers buy a second battery then leave it forgotten in a drawer. Batteries are like muscles – they need regular exercise to stay strong. If you ignore a battery for months, it can lose its ability to hold charge. By swapping between two batteries weekly, you keep both in good condition. It also helps you spot if one battery is aging faster than the other. You might find one battery lasts for three hundred shots while the other manages four hundred. This knowledge is gold when you are planning a long day of shooting.
How to approach it: Label your batteries A and B with a small piece of tape. Use battery A for one full week, charging it whenever needed. The following week, switch to battery B and put battery A in your bag as the backup. Keep alternating like this. Each month, note how many shots you got from each battery before it needed charging. This simple rotation keeps both batteries healthy and gives you a clear picture of their performance.
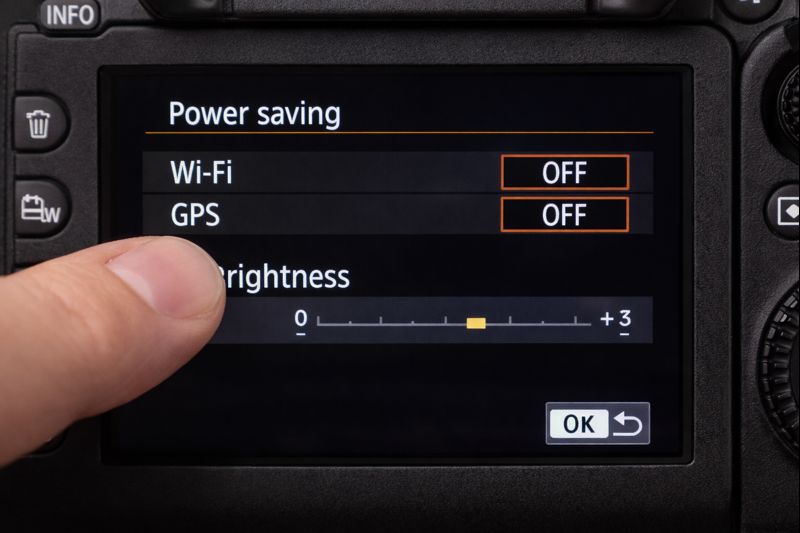
Exercise 3: The Power Saving Challenge
The task: Turn off WiFi, GPS and reduce screen brightness, then see how much longer your battery lasts.
Your camera is packed with battery-draining features you might not need. WiFi and GPS are like leaving all the lights on in your house – they use power constantly. The bright screen on the back of your camera is another culprit. This exercise shows you exactly how much power these features consume. You might be shocked to discover your battery lasts twice as long without them. For a day of shooting, these savings can be the difference between one battery and two. It is like turning off the heating in rooms you are not using.
How to approach it: First, use your camera normally for a day and count how many photos you take before the battery dies. Write this number down. Now charge the battery fully and go into your camera’s menu. Turn off WiFi, turn off GPS and lower the screen brightness to about half. Use the camera the same way for another day and count your shots again. Compare the two numbers. You will see the power saving mode in action.
Exercise 4: The Cool Room Test
The task: Leave your camera in a cool room (not a freezer) and note how the battery performs.
Batteries are sensitive to temperature. Cold weather makes them sluggish and they appear to drain faster. Hot weather can damage them permanently. This exercise teaches you how your battery responds to cooler temperatures. You will learn what to expect on a crisp autumn morning or a chilly winter day. Understanding this helps you plan – you might decide to carry a spare battery in an inside pocket where your body heat keeps it warm. It is like knowing your car starts more slowly on a frosty morning.
How to approach it: Choose a cool room in your house – perhaps a conservatory, garage or room that is not heated. The temperature should feel cool but comfortable to you, around ten to fifteen degrees Celsius. Leave your camera there with a fully charged battery for thirty minutes. Then take twenty photos as quickly as you can, checking the battery level after each shot. Note how much the battery drops. Compare this to a normal day indoors. You will see the cold effect for yourself.

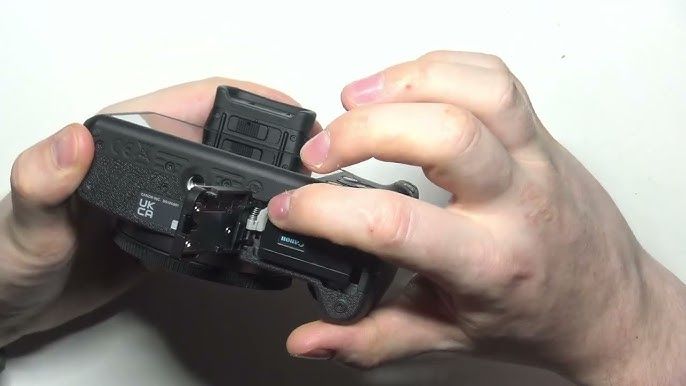
Exercise 5: The Battery Removal Drill
The task: Practise removing and reinstalling your battery without forcing it.
Camera batteries fit into tight compartments with little doors and locks. Many people yank them out or jam them in, which can damage the contacts. This drill teaches you the gentle touch needed. You will learn how the battery door opens, which way the battery slides, and how the lock mechanism clicks. Doing this smoothly means you can change batteries quickly in the field without fumbling. It also stops you from breaking the delicate battery door, which is expensive to repair. It is like learning to open a tricky jar lid without spilling anything.
How to approach it: With your camera switched off, open the battery compartment door. Look at how the battery sits inside – notice the small tab or lever that holds it in place. Practise releasing the battery gently and letting it pop up. Remove it smoothly. Now put it back, sliding it in at the same angle it came out. Listen for the click that means it is locked. Close the door. Do this five times in a row, focusing on smooth, gentle movements. Never force anything.
Your Battery Action Plan
Batteries are not exciting, but they are essential. A photographer who understands their batteries never misses a shot because of a power problem. These exercises give you that understanding. You will know exactly how long charging takes, which battery performs best, and how to make power last longer.
Try one exercise each day this week. Some, like the charge log, happen while you get on with life. Others, like the removal drill, take five minutes of focused practice. All of them build the kind of knowledge that becomes second nature.
Start with whichever exercise feels easiest. Build from there. By next month, you will be the photographer who always has spare power, knows exactly how long a charge lasts, and never panics when the battery indicator drops. That is a good photographer to be.
Tell me how you get on. Did the cool room test surprise you? Have you discovered your battery charges faster than you thought? Share your findings – your experience might help another photographer.